How to efficiently machine shaped parts on CNC mill-turn machines?
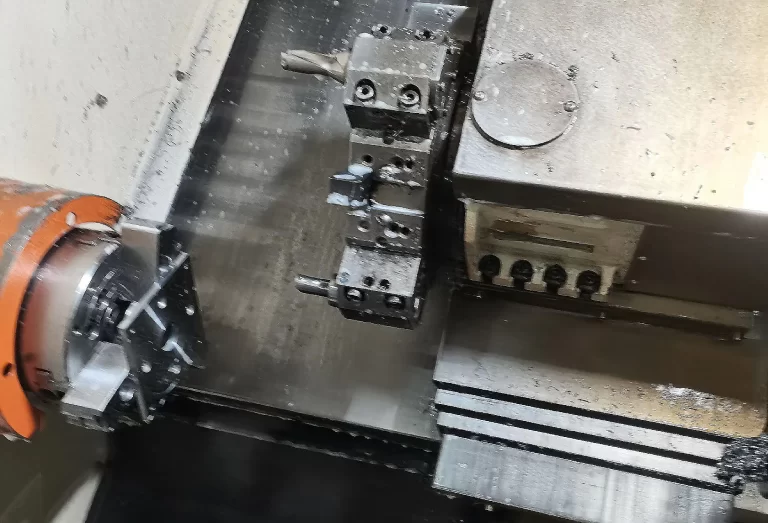


CNC lathe machining involves complex interactions among cutting parameters, tool performance, machine-tool characteristics, programming rules, and material properties.
Even minor deviations in setup, parameter selection, or programming can lead to tool chipping, vibration, dimensional drift, poor surface quality, or machine alarms.
This set of technical notes summarizes practical field-tested rules covering cutting temperature, cutting force, tool life, parameter matching, tooling, FANUC G-code programming, threading, grooving, drilling, reaming, and special-material turning.
These guidelines help operators and programmers select reasonable process parameters, avoid common faults, stabilise part accuracy, reduce tool loss, and improve production efficiency.
Factors affecting cutting temperature: cutting speed, feed rate, and depth of cut.
Factors affecting cutting force: depth of cut, feed rate, and cutting speed.
Factors affecting tool life: cutting speed, feed rate, and depth of cut.
When the depth of cut doubles, the cutting force doubles;
When the feed rate doubles, the cutting force increases by approximately 70%;
When the cutting speed doubles, the cutting force gradually decreases;
In other words, if you use G99, the cutting force will not change significantly even if the cutting speed increases.
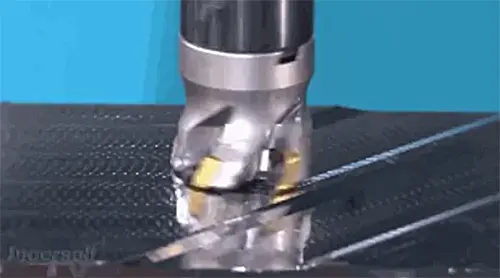
You can determine whether the cutting force and cutting temperature are within normal ranges by observing the chip discharge.
When machining a concave arc where the actual measured value X is greater than 0.8 times the diameter Y specified on the drawing, the R machined by a turning tool with a secondary rake angle of 52 degrees (i.e., the turning tool we commonly use with a 35-degree insert and a 93-degree main rake angle) may experience tool contact at the starting point.
Temperatures indicated by the color of metal shavings: White: less than 200 degrees
Yellow: 220–240 degrees
Dark blue: 290 degrees
Blue: 320–350 degrees
Purple-black: greater than 500 degrees
Red: greater than 800 degrees
FUNAC OI mtc Default G-Codes:
G69: Not clear
G21: Metric dimension input
G25: Disable spindle speed fluctuation detection
G80: Cancel fixed cycle
G54: Default coordinate system
G18: Select ZX plane
G96 (G97): Constant linear speed control
G99: Feed per revolution
G40: Tool tip compensation canceled (G41, G42)
G22: Travel limit detection enabled
G67: Modal macro call canceled
G64: Not sure
G13.1: Polar coordinate interpolation mode canceled
The external thread is typically 1.3P, and the internal thread is 1.08P.
Thread rotational speed S1200 / pitch × safety factor (typically 0.8).
Manual tool tip R compensation formula: When chamfering from bottom to top: Z = R * (1 – tan(a/2)) X = R * (1 – tan(a/2)) * tan(a) When chamfering from top to bottom, simply replace subtraction with addition.
For every 0.05 increase in feed rate, the spindle speed is reduced by 50–80 rpm.
This is because lowering the spindle speed reduces tool wear and slows the increase in cutting force, thereby offsetting the effects of increased cutting force and higher temperatures caused by the increased feed rate.
Cutting speed and cutting force have a crucial impact on cutting tools; excessive cutting force is the primary cause of tool chipping.
The relationship between cutting speed and cutting force:
When the cutting speed increases while the feed rate remains constant, the cutting force gradually decreases.
At the same time, higher cutting speeds cause the tool to wear out faster, leading to an increase in cutting force and rising temperatures.
When the cutting force and internal stresses become too great for the insert to withstand, the tool will chip.
(Of course, other factors such as stress caused by temperature changes and a decrease in hardness also play a role.)
When machining on a CNC lathe, special attention should be paid to the following points:
(1) Currently, in China, economic CNC lathes generally use standard three-phase induction motors with variable-frequency drives (VFDs) to achieve stepless speed control.
Without mechanical reduction, the spindle often lacks sufficient output torque at low speeds.
If the cutting load is too high, the machine is prone to stalling.
However, some machines are equipped with gear-driven speed ranges, which effectively resolve this issue.
(2) Whenever possible, ensure that a single cutting tool can complete the machining of a part or a full work shift.
This is especially important for the finishing of large parts, where care must be taken to avoid tool changes midway through the process to ensure the part can be machined in a single operation.
(3) When threading on a CNC lathe, use the highest possible speed to achieve high-quality, efficient production.
(4) Use G96 whenever possible.
(5) The fundamental concept of high-speed machining is to set the feed rate higher than the heat conduction rate, thereby removing cutting heat along with the chips and isolating it from the workpiece to ensure minimal or no temperature rise.
Therefore, high-speed machining involves selecting a very high cutting speed matched with a high feed rate, while using a small depth of cut.
Workpiece Material Machinability Classification Table (Small, p. 79)
Table of Common Thread Cutting Passes and Back Depth of Cut (Large, p. 587)
Formulas for Common Geometric Shapes (Large, p. 42)
Inch-to-Millimeter Conversion Table (Large, p. 27)
Vibration and tool chipping often occur during grooving; the root cause of all these issues is increased cutting force and insufficient tool rigidity.
The shorter the tool overhang, the smaller the rake angle, and the larger the insert area—the better the rigidity—the greater the cutting force the tool can withstand.
However, as the width of a grooving cutter increases, the cutting force it can withstand also increases accordingly;
Conversely, a narrower grooving cutter can withstand less force, but its cutting force is also reduced.
Causes of Vibration During Grooving:
(1) Excessive tool overhang, resulting in reduced rigidity.
(2) Too slow a feed rate, leading to increased cutting force per unit area and causing significant vibration.
The formula is: P = F / depth of cut × f, where P is the cutting force per unit area and F is the cutting force.
Additionally, excessive spindle speed can also cause tool vibration.
(3) Insufficient machine tool rigidity—that is, while the tool can withstand the cutting force, the machine tool cannot.
Simply put, the machine cannot handle the cutting load. Generally, new machines do not experience this issue;
Machines that do are either very old or have frequently been subjected to conditions that are harmful to the machine.
When turning a workpiece, the dimensions seemed fine at first, but after a few hours, I noticed that the dimensions had changed and were inconsistent.
The likely reason is that, at the beginning, the cutting tools were new, so the cutting forces were not very high.
However, after turning for a while, the tools wore down, increasing the cutting forces and causing the workpiece to shift in the chuck, which resulted in the dimensions constantly changing and becoming inconsistent.
When using G71, the values of P and Q cannot exceed the total number of blocks in the program; otherwise, an alarm will occur: “Incorrect G71-G73 command format”—at least in FUANC.
There are two formats for subroutines in the FANUC system:
(1) P000 0000: The first three digits indicate the number of cycles, and the last four digits are the program number.
(2) P0000L000: The first four digits are the program number, and the three digits following the “L” indicate the number of cycles.
If the starting point of the arc remains unchanged and the endpoint is shifted by a mm in the Z direction, then the position of the arc’s base diameter is shifted by a/2.
When drilling deep holes, do not grind cutting grooves into the drill bit to facilitate chip evacuation.
If you’re using a tool holder designed for machining to drill holes, you can rotate the drill bit to adjust the diameter of the hole.
When drilling a center hole in stainless steel, or when drilling holes in stainless steel, the drill bit or center drill must be small enough; otherwise, it will not penetrate the material.
When drilling with a cobalt drill bit, do not groove the bit to prevent it from annealing during the drilling process.
Depending on the manufacturing process, cutting is generally divided into three types: cutting one piece at a time, cutting two pieces at a time, and cutting an entire bar at once.
If the thread becomes oval while threading the bar, it may be because the material has shifted; simply run the threading tool over it a few more times.
In some systems that support macros, macros can be used in place of subroutine loops, which saves program numbers and avoids many complications.
If you are reaming a hole with a drill bit but the hole exhibits significant runout, you can use a flat-bottom drill for reaming;
However, the twist drill must be short to increase rigidity.
If you drill a hole directly on a drill press using a drill bit, the hole diameter may deviate from the target size;
However, if you ream the hole on a drill press, the dimensions generally remain accurate.
For example, if you ream a hole on a drill press using a 10-mm drill bit, the resulting hole diameter will typically have a tolerance of around 3 si.
When drilling small holes (through holes), try to ensure that the chips are continuously coiled and discharged from the tail end.
Key points for chip coiling: First, position the tool slightly higher; second, ensure appropriate rake angle, depth of cut, and feed rate.
Remember that the tool must not be positioned too low, as this can easily cause the chip to break.
If the tool has a large secondary rake angle, the chip will not jam in the tool shank even if it breaks.
However, if the secondary rake angle is too small, the broken chip will jam in the tool shank, creating a potential hazard.
The larger the cross-sectional area of the tool shank inside the hole, the less likely the tool is to vibrate.
You can also wrap a strong rubber band around the tool shank, as it can help dampen vibrations to some extent.
When turning copper holes, the tool tip radius (R) can be set slightly larger (R0.4–R0.8), especially when turning a downward taper;
While this may not be a problem with iron workpieces, it can cause severe chip jamming in copper workpieces.
Mastery of CNC lathe processing relies on understanding the physical relationships between cutting speed, feed rate and depth of cut, as these three core parameters jointly govern cutting force, cutting temperature and tool service life.
Many typical defects including tool chipping, grooving vibration, unstable dimensions, threading failures and drilling problems originate from unreasonable parameter settings, insufficient system rigidity, programming errors, or improper tool handling.
Observing chip shape and chip colour provides an intuitive way to judge real-time cutting conditions.
Following FANUC system syntax rules for cycles and subroutines prevents unexpected alarms.
Special materials such as stainless steel and copper require targeted adjustments for tool geometry and chip-evacuation strategies.
Applying these practical rules in daily production can effectively lower scrap rates, extend tool life, and achieve stable, high-efficiency CNC turning operations.