
How to efficiently machine shaped parts on CNC mill-turn machines?
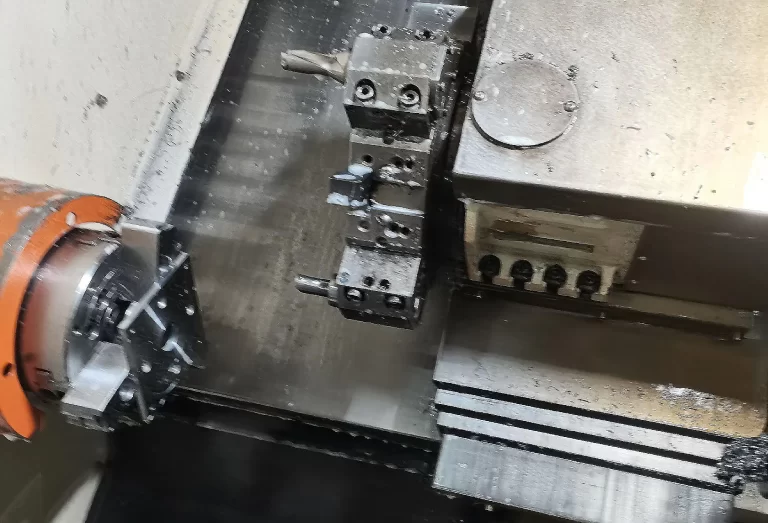

Thin-walled parts offer advantages such as low weight, compact structure, and high material utilization, and are widely used in fields such as aerospace, automotive manufacturing, and precision instrumentation.
Due to their thin walls and low rigidity, these parts are highly susceptible to deformation—including bending, warping, and vibration—during CNC machining.
This is caused by factors such as cutting forces, cutting heat, and residual stresses, leading to dimensional inaccuracies and increased geometric errors.
Therefore, conducting research on the optimization of CNC machining paths to address deformation in thin-walled parts and thoroughly analyzing the influence of process parameters will help resolve the challenges of machining deformation in thin-walled parts and promote the technological advancement of high-end thin-walled component manufacturing.
Process parameters are key variables that cause deformation during the CNC machining of thin-walled parts.
By altering cutting forces, the distribution of cutting heat, and the stress state of the material, they affect the machining accuracy of thin-walled parts.
Thin-walled parts have low rigidity, and increasing both the cutting depth and cutting width will lead to an increase in cutting forces.
For every 0.1 mm increase in cutting depth, the radial cutting force can increase by 15% to 20%; excessive radial forces can easily cause thin-walled parts to bend and deform.
Excessively wide cutting widths increase the contact area between the tool and the workpiece, leading to localized stress concentrations and causing warping of thin-walled parts.
When the rake angle is small, the proportion of axial cutting force increases, making thin-walled cavity structures prone to collapse and deformation.
Excessively high cutting speeds prevent frictional heat between the tool and the workpiece from dissipating quickly enough.
This leads to localized temperature increases in thin-walled parts, which may reach the material’s softening range.
When temperatures exceed 200 °C, the elastic modulus of thin-walled aluminum alloy parts decreases by at least 30%, and even relatively small cutting forces can cause irreversible thermal deformation.
The compatibility between feed rate and spindle speed affects deformation stability.
If the feed rate is too slow, it prolongs the cutting time of the tool in the same area, leading to localized heat buildup and increasing the risk of thermal deformation.
Excessively high feed rates cause instantaneous peaks in cutting forces, which can easily trigger vibration and deformation in thin-walled parts.
When the spindle speed is too low, the frequency of cutting force fluctuations approaches the natural frequency of the thin-walled part, potentially inducing resonance and amplifying the extent of deformation.
When the spindle speed is too high, the centrifugal force exerted on the thin-walled part intensifies, significantly affecting cantilevered thin-walled structures.
First, adopt a sequence that machines areas with higher rigidity first, followed by areas with lower rigidity.
Different regions of thin-walled parts exhibit varying degrees of rigidity; areas with ribs are stiffer than those without.
During machining, start by cutting the ribbed sections to leverage the ribs’ support for the surrounding thin walls, thereby enhancing the overall structural stability.
Second, follow the sequence of machining internal bores before external circles, and deep cavities before shallow ones.
When machining internal bores and deep cavities, the tool overhang is longer, cutting forces fluctuate more significantly, and heat tends to accumulate in enclosed spaces.
Completing these operations first prevents the deformation already generated in the internal bores from combining with the force-heat effects during subsequent external circle or shallow cavity machining.
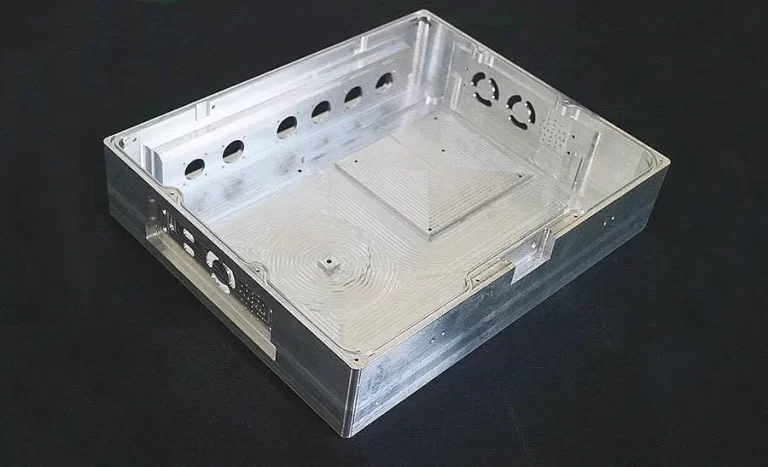
When machining thin-walled box-shaped parts, first perform rough and finish milling of the internal deep cavities.
After allowing heat to dissipate fully and the internal bore stresses to be partially released, machine the external thin-walled contours.
This reduces warping deformation caused by the interaction of internal and external forces and heat.
Finally, employ a zone-by-zone alternating machining approach to distribute the force and heat loads.
First, divide the machining area into separate zones for roughing and finishing, with roughing performed before finishing.
Based on the structural characteristics of thin-walled parts, divide the part into dedicated roughing and finishing zones to prevent the high cutting forces of roughing from affecting finishing accuracy.
Second, adopt a strategy of high feed rates and layered material removal to achieve step-by-step force relief.
During rough machining, precision is not the primary concern; instead, the focus is on dispersing cutting forces through layered machining.
Engineers divide the total stock into 3 to 4 layers, with each layer removing 1.2 to 1.5 mm of material using helical or circular cutting paths.
Finally, engineers use a strategy of small stock allowances and predominantly up-cut milling to achieve stepwise stress release.
Engineers reserve a 0.3–0.5 mm allowance before finishing. The process plans the toolpath to avoid overlapping with the roughing path, thereby reducing friction and compression between the tool and workpiece and lowering the rate of new residual stress generation.
The finishing path extends along the direction of greater rigidity in the thin-walled component.
First, engineers employ symmetrical toolpaths to balance local stresses by leveraging the stress-cancellation effect.
Based on the symmetrical structural characteristics of thin-walled parts, engineers plan mirror-symmetrical cutting paths so that the residual stresses generated in the symmetrical regions have opposite directions, similar magnitudes, and cancel each other out, thereby reducing the overall stress level.
Second, engineers combine layered paths to release residual stresses in stages.
Engineers proportionally divide the cutting depth of the thin-walled part into multiple layers.
Engineers machine each layer using a complete symmetrical path.
After completing each layer, engineers pause machining to allow the part to cool naturally and release the residual stresses generated in that layer before proceeding to the next layer.
Finally, engineers adapt the symmetrical and layered paths to meet the stress compensation requirements of the thin-walled part’s asymmetrical structure.
For asymmetric thin-walled parts, engineers construct equivalent symmetric paths using virtual symmetry planes.
Engineers reserve stress-compensation cutting zones at corresponding positions in the asymmetric areas, and these zones balance the residual stresses through the stresses generated during the compensation cutting.
The deformation of thin-walled parts during machining is influenced by the interaction of multiple factors.
By using simulation to predict deformation trends, real-time feedback data, and dynamic path adjustments, it is possible to achieve precise alignment between the machining path and deformation control, thereby significantly improving the machining accuracy of thin-walled parts.
Before actual machining, engineers use finite element simulation to predict deformation and preliminarily plan a reference path.
Engineers establish a 3D finite element model of the thin-walled part and input the proposed initial machining path parameters to simulate stress distribution, temperature field changes, and deformation during the cutting process.
During actual machining, sensors capture dynamic deformation deviations through real-time data acquisition and feedback.
Sensors collect real-time deformation and temperature data from critical areas of the thin-walled part.
The system compares the collected actual data with the pre-machining simulation data to analyze the causes of deviations.
Based on the feedback data, the system dynamically corrects the toolpath, iteratively optimizes machining parameters, and automatically adjusts parameters for subsequent machining paths.
If excessive cutting forces cause deformation to exceed tolerances, the system reduces the cutting depth for the next layer and optimizes the toolpath to avoid stress concentration zones.
If cutting heat causes deformation, the system adjusts the feed rate to shorten the cutting time of the tool in the same area.
Specialized optimization plans for machining thin-walled cavity structures can be developed in areas such as toolpath planning, parameter control, and auxiliary support to effectively suppress deformation.
Toolpath planning employs strategies that proceed from the inside out, use layered ring-cutting, and incorporate support structures.
Rough machining starts from the center of the cavity bottom, using a spiral ring-cutting path that expands outward layer by layer.
Engineers control the cutting depth for each layer between 0.8 and 1.2 mm to avoid concentrated stress on the cavity walls caused by deep single-pass cutting.
Engineers reserve temporary support ribs 2 to 3 mm wide at the junctions between the cavity walls and the part’s base material.
Once rough machining of the cavity walls is complete, engineers remove these support ribs; their presence enhances the rigidity of the cavity walls during machining, thereby preventing inward deformation of the walls into the cavity.
For finishing, switch to a reverse spiral path cutting from the outside toward the center, machining along the outer surface of the cavity wall toward the center.
This directs the cutting forces toward the part’s base material, utilizing the base’s support to offset part of the cutting forces.
The finishing path should be offset by 5°–10° from the roughing path to reduce stress accumulation at the same location.
Regarding process parameter adaptation, for thin-walled cavity structures, adjust the cutting parameters to reduce mechanical and thermal loads.
Engineers adjust the cutting speed according to the material properties.
For example, when machining thin-walled cavities in aluminum alloys, engineers control the cutting speed between 800 and 1,200 m·min⁻¹ to avoid excessive cutting heat caused by high speeds, which can lead to softening of the cavity walls.
Engineers set the feed rate to 100–150 mm·min⁻¹ to balance machining efficiency with cutting forces and prevent cavity wall vibration caused by excessive feed rates.
Select end mills with a short edge-to-diameter ratio to reduce chattering caused by excessive overhang.
Chattering can cause rippling deformation of the cavity walls.
The tool edges should be desensitized to minimize squeezing and tearing of the cavity wall material and reduce residual stress.
Optimized cooling and support control deformation during the machining of thin-walled cavity structures.
High-pressure internal cooling directs coolant directly to the tool-workpiece contact area, promptly dissipating cutting heat and preventing localized overheating of the cavity walls.
For deep cavities exceeding 20 mm in depth, the process inserts biodegradable polymer support blocks during machining.
The process controls the gap between the support blocks and the cavity walls between 0.1 and 0.2 mm to provide temporary support for the cavity walls.
The machining path planning employs a strategy of “progressing from the fixed end to the free end in segments.”
During the roughing stage, the tool begins cutting at the fixed end where the cantilever connects to the base and gradually advances toward the free end, thereby preventing the cantilever from sagging due to tool thrust when machining starts from the free end.
For example, when machining an 80 mm long thin-walled cantilever, the path is divided into three segments.
After completing each segment, the process pauses for 5 to 8 seconds to allow the cantilever to recover from elastic deformation before proceeding to the next segment.
Down-cut roughing reduces the tool’s compressive force on the cantilever, while lateral cutting helps distribute the cutting forces.
For finishing, the process reverses the path and moves from the free end toward the fixed end.
Since roughing removes most of the material, the reverse machining directs the cutting forces toward the fixed end.
The support provided by the substrate helps offset some of these forces, thereby reducing deformation at the free end.
The finishing path must intersect the roughing path at a 45° angle.
Regarding process parameter adjustments, engineers apply different parameters based on the cantilever’s position.
The cantilever region near the fixed end has higher rigidity; engineers set the cutting depth to 1.0–1.2 mm and set the feed rate to 120–150 mm·min⁻¹.
As the cutting process advances toward the overhanging end, engineers reduce the cutting depth by 0.2 mm and reduce the feed rate by 20 mm·min⁻¹ for every 20 mm of advancement.
For example, in the 20-mm overhanging section, engineers control the cutting depth between 0.4 and 0.6 mm and control the feed rate between 80 and 100 mm·min⁻¹.
Gradual parameter reduction reduces the load on the overhanging end.
Engineers use an end mill with an ultra-fine shank diameter and short cutting edge length, and they combine it with high-speed steel to enhance rigidity and reduce tool chatter.
The tool cutting edge features a double-arc design to reduce cutting resistance against the overhanging material.
The machining process plans the hole sequence using a strategy of symmetrical distribution and intermittent machining.
Based on the symmetrical characteristics of the hole distribution, the process machines holes in symmetrical positions first to allow the stresses generated by symmetrical cutting to cancel each other out.
For example, when machining a thin-walled part with multiple holes arranged in a 3×3 array, the process machines the symmetrical holes in the upper-left and lower-right corners first.
The process then machines the symmetrical holes in the upper-right and lower-left corners. Finally, the process machines the center hole.
After completing each set of symmetrical holes, pause for 10 seconds to allow the part to release localized stress.
If the hole positions lack obvious symmetry, machine them in a sequence skipping 1 to 2 holes to reduce bending deformation in the thin-walled areas between holes.
The machining path planning for individual holes employs a combination of staged drilling and reaming with helical milling.
During the drilling stage, do not drill through in a single pass; instead, drill in 3–4 stages to 90% of the hole depth, with the feed depth per stage controlled within one-third of the hole diameter.
For example, when machining an 8 mm diameter hole, the process limits the feed depth per stage to no more than 2.5 mm.
The process also applies a helical cutting path in each stage.
During the reaming stage, the process reserves a 0.2–0.3 mm allowance.
The process uses a clockwise helical milling path, and the milling cutter performs a spiral motion around the hole center to gradually enlarge the hole diameter to the design size.
The process controls the helix angle between 5° and 8° to ensure that cutting forces distribute evenly along the circumference of the hole wall.
The connection path between holes should extend along the direction of greater rigidity in the thin-walled part, with tool change paths planned along the edges of the part or the direction of the ribs.
Regarding process parameter adaptation, process engineers adjust cutting parameters according to the characteristics of the hole locations.
During the drilling stage, high-speed steel drills operate at a cutting speed of 300–500 m·min⁻¹. They also operate at a feed rate of 80–100 mm·min⁻¹.
This reduces frictional heat between the drill bit and the hole wall.
For reaming, use a carbide end mill, increasing the cutting speed to 600–800 m·min⁻¹ and reducing the feed rate to 60–80 mm·min⁻¹;
This high-speed, low-feed approach minimizes the compressive force exerted on the hole wall by the cutting forces.
For areas between holes where the wall thickness does not exceed 1.5 mm, machining adjacent holes requires further reduction of the cutting depth and increased cooling frequency.
Pulse cooling promptly removes cutting heat from the inter-hole regions, preventing deformation caused by material softening.
Deformation issues in the CNC machining of thin-walled parts affect both machining accuracy and production efficiency.
Optimizing the machining sequence, planning roughing and finishing paths, and introducing symmetrical layered paths and dynamic correction strategies mitigate deformation from multiple angles.
Specialized optimization schemes target critical structures such as thin-walled cavities, cantilevered thin-walled sections, and multi-hole configurations.
These schemes enhance the effectiveness of deformation control.
These approaches provide robust technical support for the production of high-end thin-walled components in aerospace and automotive manufacturing fields.
With the rapid development of the modern manufacturing industry, the…
Easy to deform thin-walled parts processing, has been the processing…
Now we attach importance to the design of intelligent agricultural…